Getting Started With Mosquitto on a Raspberry Pi
Janne Kemppainen |In this post we will install and configure a MQTT broker called Mosquitto on a Raspberry Pi.
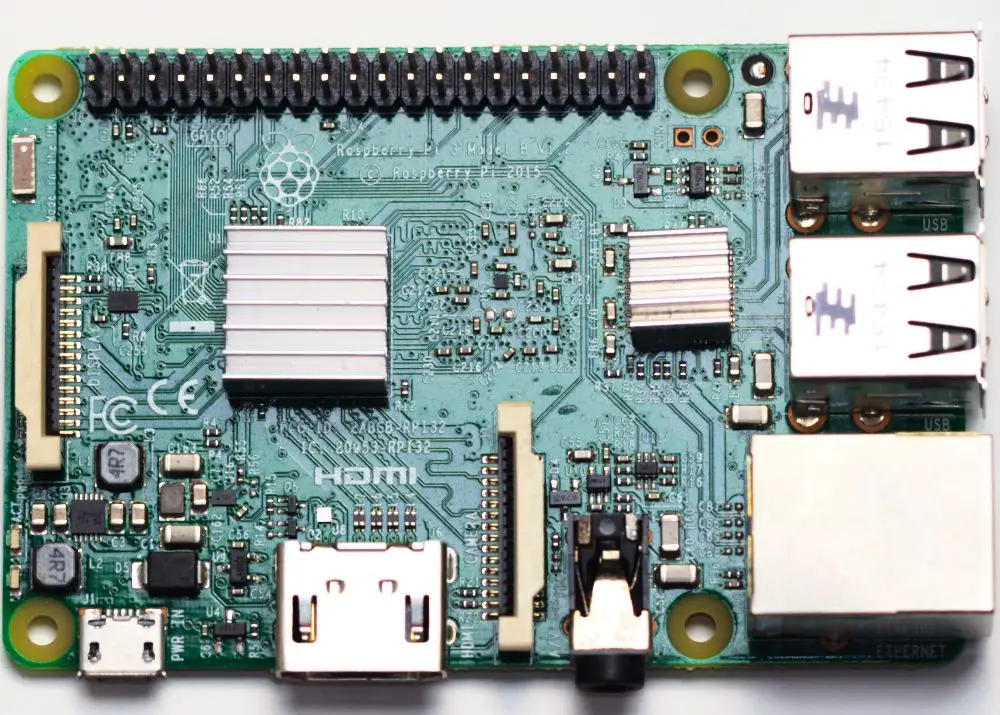
To follow this post you will need a Raspberry Pi with the Raspbian OS installed. You can check out my previous tutorial to install and configure the Pi before starting with Mosquitto.
What is MQTT and Mosquitto?
MQTT is a messaging protocol that relies on a publisher-subscriber scheme where clients connect to a central broker. Each client publishes or subscribes data to/from one or more topics that they are interested in. The broker handles the data communication to all interested parties so that the clients don’t need to do direct connections to each other.
A typical use case for MQTT within the maker space is for sending data in a home automation system. For example temperature measuerements from different rooms can be sent as MQTT messages from the measurement nodes to a central monitoring display. The benefit of the solution is that it is easy to expand the system as you only need to add new MQTT topics.
Mosquitto is the most popular MQTT broker. It is an open source program written in C and it is available for different platforms.
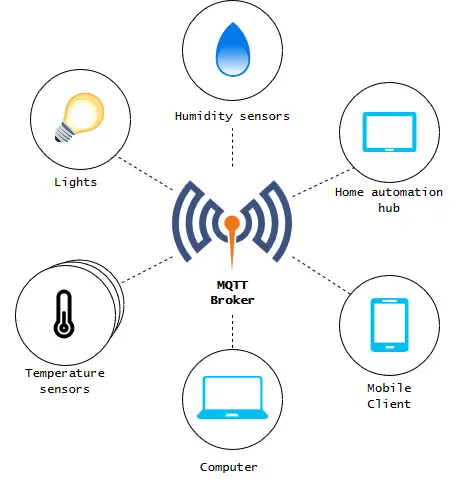
Example use case for a MQTT broker
Installing Mosquitto
Installing Mosquitto is easy if you have a modern Raspberry Pi (2 or newwer). The original Pi has some compatibility issues so these instructions don’t apply to it.
First make sure that your package repositories and installed packages are up to date
>> sudo apt update -y
>> sudo apt dist-upgrade -y
Next, install Mosquitto and the clients
>> sudo apt install -y mosquitto mosquitto-clientsThe Mosquitto server should start automatically. Verify the status of the service:
>> sudo systemctl status mosquitto.service
● mosquitto.service - LSB: mosquitto MQTT v3.1 message broker
   Loaded: loaded (/etc/init.d/mosquitto; generated; vendor preset: enabled)
   Active: active (running) since Wed 2019-04-17 16:29:55 BST; 5s ago
     Docs: man:systemd-sysv-generator(8)
   CGroup: /system.slice/mosquitto.service
           └─11551 /usr/sbin/mosquitto -c /etc/mosquitto/mosquitto.conf

Apr 17 16:29:55 raspberrypi systemd[1]: Starting LSB: mosquitto MQTT v3.1 message broker...
Apr 17 16:29:55 raspberrypi mosquitto[11545]: Starting network daemon:: mosquitto.
Apr 17 16:29:55 raspberrypi systemd[1]: Started LSB: mosquitto MQTT v3.1 message broker.
The service is enabled by default so it should survive rebooting and come back up with the OS.
Test that the installation works
Now that the MQTT server is running in the background it is time to test that the messaging works by creating a subrsciber and a publisher. Testing can be done with the tools that were installed with the mosquitto-clients package earlier.
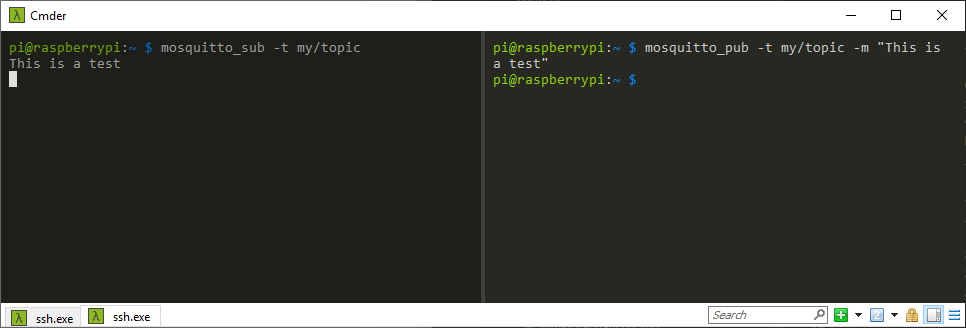
Make two SSH connections to the Pi. On the first connection create a new Mosquitto subscriber:
>> mosquitto_sub -t my/topicThis will create a connection to the local MQTT server and subscribe to the my/topic topic. The topics can be split to different levels with the topic separator /. In this case the top level is my and the level below that is topic.
Now in the another terminal publish a message to the test topic:
>> mosquitto_pub -t my/topic -m "This is a test"The message text should now appear in the other window.
About the MQTT protocol
Topics
We shortly discussed about the MQTT topic structure when testing the installation but let’s take a closer look at how the thing actually works.
The MQTT network consists of two types of components: clients and brokers. Clients connect to a broker which then deliveres the message to the appropriate receivers. Multiple brokers can be bridged together to create larger networks.
The messaging is based on topics that don’t need to be defined beforehand. A client may subscribe or publish to an arbitrary topic and the broker will relay the message to all receivers that have subscribed to it.
Topics are case sensitive strings that may not contain whitespace characters. They can be organized into higher and lower level groups with the forward slash. Some valid topics are:
- home/kitchen/temperature
- home/garage/temperature
- home/garage/door
- home/garage/light
- 1c1feeea-628e-11e9-a923-1681be663d3e/status
Topic levels can be used to subscribe to multiple topics at once with wildcards. Single level wildcards are are denoted with the plus symbol +. Given that the above topics are defined on the MQTT server you can select all temperatures in the home group with:
home/+/temperatureYou can try this out with the Mosquitto clients by subscribing to a topic with a wildcard such as:
>> mosquitto_sub -t my/+/topic -vThe -v parameter enables verbose mode which prints the topic of the received message. Try sending messages with different intermediate levels:
>> mosquitto_pub -t my/test/topic -m "This is a test"
>> mosquitto_pub -t my/fun/topic -m "This is a test"
The other terminal should now look like this:
pi@raspberrypi:~ $ mosquitto_sub -t my/+/topic -v
my/test/topic This is a test
my/fun/topic This is a test
Similarly you can match multiple topic levels with the hash character #. Try changing the topic subscription to the following and then publish again:
>> mosquitto_sub -v -t my/#This will catch any topics under the topic my.
Note that the wildcards match only full topic levels, not partial topics.
Quality of Service
MQTT offers three levels of Quality of Service (QoS) for the topics. QoS defines how much effort is put to make sure that the messages are received by their intended recipients.
0 At most once
The lowest QoS setting 0 attempts sending the message once. The receiving end does not send an acknowledgement when it receives the message and no re-transimission will be attempted if the message couldn’t be delivered.
Use this setting when the connection is good and packet loss is unlikely or if missing packets are acceptable.
1 At least once
With QoS 1 the sender tries retransmitting the message until it receives an acknowledgement from the receiver. Therefore it is quaranteed that the message has been delivered at least once but if the acknowledgement message didn’t get through there can be duplicates.
2 Exactly once
This is the most strict QoS. It ensures that the message is received once, and only once. This will require more resources as the broker and the client need to send multiple packets to make sure that the message has been received. Therefore you should probably use QoS 2 only when it is imperative that the messages are received once. You should think twice especially if you are running MQTT on a battery powered device.
Persistent sessions and data
Some clients such as microcontrollers can save power by going to sleep and only wake up when they need to send or receive data. MQTT allows persistent connections which means that the broker will store the session data and keep track of the messages that haven’t been received yet by the client.
When the client comes back online the broker will attempt sending all the messages that have been sent to the topic while the client was offline. This only works for QoS 1 and 2 as they have message acknowledgements. The QoS 0 fire and forget method doesn’t allow persistent sessions.
In addition to persistent sessions the broker can store the latest data of a topic. These so called retained messages are sent when a client subscribes to a new topic. Therefore the client doesn’t need to wait until a new value is published but it can initialize with the latest available data.
Conclusion
As you can see installing Mosquitto was quite easy. Now you should ready to start tinkering with it and you should also have a basic understanding of the MQTT protocol.