Create Your Own Python Packages
From programming to publishing
Janne Kemppainen |When programming in Python you’re used to installing packages from the Python Package Index (PyPI). But how do the packages end up there? How can I make my Python code installable? Let’s find out!
In this post I’ll show you how to build a custom Python package, and how to create an automatic build pipeline with GitHub Actions so that you don’t have to publish it manually every time.
I’m going to assume that you know how to use Git (you really should anyway). If you need a refresher on Git you can check out my post on Git essentials. You can also use the GitHub Desktop client or the version control integration of your IDE.
You can find all the code from the GitHub repository.
Structuring the project
The most important thing in a package is naturally the code. However, the idea of this post is not to create an awesome new package for the community but to show the general process of building packages. So with that in mind let’s create something relatively simple.
So after three or so hours of desperately trying to come up with ideas I finally got this idea for a small utility:
Create a consistent selector that gets a list of possible values and chooses one based on the current date.
Well that’s simple enough. Let’s get coding!
Setting up
The very first thing that I did was to create a new project on GitHub and then clone that to my computer so that I can have everything nicely under version control. When starting a new project in GitHub you can choose the software license and a .gitignore template during the initialization. In this project I chose the MIT License and a .gitignore with common Python exclusions.
The next part is to create the correct directory structure. I’ll be calling my new package consistentor so I need to create the corresponding directory and create an empty __init__.py file inside it to mark it as a Python package. I also created a tests directory in preparation for unit testing.
I’m going to be using the rendezvous hashing algorithm to consistently select items so we are going to need some sort of a hash algorithm. The Python built in hashlib contains several algorithms but I want to include additional dependencies in my package to show you how they are handled. I’ve chosen xxhash which is a fast non-cryptographic hashing library.
Add your dependencies to a file called requirements.txt, in my case the file looks like this:
xxhash
Next, create a virtual environment using this command:
>> python3 -m venv venv
Activate the environment with (Mac/Linux):
>> . venv/bin/activate
or (Windows PowerShell):
>> .\venv\Scripts\Activate.ps1
Now install the requirements
>> python3 -m pip install -r requirements.txt
You can use any editor you like but if you’re using Visual Studio Code it should detect your virtual environment automatically when you start editing a Python file in your project.
You might also want to check out my article on how you can use GNU Make to improve your Python development.
This is how the directory now looks (omitting the venv directory):
├── LICENSE
├── README.md
├── consistentor
│   └── __init__.py
├── requirements.txt
└── tests
Code implementation
The next task is to write the actual library implementation which I will keep quite simple. In this example I’ll be implementing the basic rendezvous hashing algorithm without item weights.
The first code file is consistentor/rendezvous.py and it contains the actual algorithmic implementation:
import xxhash
from typing import List


def rendezvous_hash(key: str, items: List[str]):
    selected = None
    highest_score = -1
    for item in items:
        score = xxhash.xxh64_intdigest(f"{key}{item}")
        if score > highest_score:
            selected = item
            highest_score = score
    return selected
It’s quite simple, indeed. The rendezvous_hash takes a key and a list of items as inputs and returns the item with the highest score. The score values are calculated by combining the given key with an item and then calculating a hash as an integer value. Then the item that gets the highest calculated value wins!
By the way, this algorithm has some really nice properties with regards to distributing the selections. When using a good and evenly distributed hash algorithm each item is equally likely to be selected. This also applies when adding or removing nodes to/from the list so if the items were for example servers then dropping one of them would distribute the load evenly on the remaining servers and vice versa.
Now let’s use this function in another file called consistentor/selector.py:
import datetime
from consistentor.rendezvous import rendezvous_hash


class Selector:
    def __init__(self, items=None):
        self.items = items if items else []

    def select_for_date(self, date: datetime.date = None):
        if not date:
            date = datetime.date.today()
        return rendezvous_hash(date.isoformat(), self.items)
For the sake of this tutorial this is again quite simple. The file implements a class named Selector which takes a list of items in the constructor and has a method select_for_date() which returns a selection for the current day or a given date value. You could use this utility to distribute house chores, for example.
Edit the consistentor/__init__.py file and add the following import:
from consistentor.selector import Selector
This makes the Selector class available on the package level when importing on other applications.
Unit testing
Now, let’s add some tests to make sure that our code works as it should. Here is the file tests/test_rendezvous.py:
import unittest
from collections import defaultdict
from consistentor.rendezvous import rendezvous_hash


class TestRendezvous(unittest.TestCase):
    def setUp(self):
        self.items = ["pizza", "burger", "pasta", "pita"]

    def test_consistency(self):
        self.assertEqual("pizza", rendezvous_hash("1", self.items))
        self.assertEqual("pizza", rendezvous_hash("1", self.items))
        self.assertEqual("burger", rendezvous_hash("abc", self.items))
        self.assertEqual("pita", rendezvous_hash("test", self.items))

    def test_uniformity(self):
        keys = defaultdict(int)
        for i in range(int(1000)):
            selected = rendezvous_hash(str(i), self.items)
            keys[selected] += 1
        for key in keys:
            self.assertGreater(keys[key], 200)
The first test asserts that the selection is consistent. If this test breaks we will know that our algorithm has changed in a way that will impact users. Could you imagine the consequences if this library was used to select servers for caching image or video content and a new version changed how the keys and nodes are mapped? Of course the caches would suddenly become invalid and the origin servers could quickly become overloaded!
The next test verifies that the distribution is somewhat even. It iterates the selection with a thousand keys and counts how many times each item was chosen. The expected value with a list of four items is 250 selections, so if every item has been selected at least 200 times the algorithm should be close enough.
The next test is for the selector class and it’s located in tests/test_selector.py:
import unittest

from datetime import date

from consistentor import Selector


class TestSelector(unittest.TestCase):
    def setUp(self):
        self.items = ["pizza", "burger", "pasta", "pita"]
        self.selector = Selector(self.items)

    def test_selection_default_value(self):
        selected1 = self.selector.select_for_date()
        selected2 = self.selector.select_for_date()
        self.assertEqual(selected1, selected2)
        self.assertIn(selected1, self.items)

    def test_selection_with_date_input(self):
        selected1 = self.selector.select_for_date(date(2020, 4, 1))
        self.assertEqual("pizza", selected1)
        selected2 = self.selector.select_for_date(date(2020, 4, 20))
        self.assertEqual("pasta", selected2)
The file contains two tests. The first test verifies that two subsequent calls return the same value when the date parameter hasn’t been provided. The selection should stay consistent for the day. The second just test verifies the return values of two example cases.
You can run the tests from your IDE or from the command line with this command:
>> python -m unittest discover tests
This calls the unittest module in test discovery mode and searches for test files in the “tests” directory.
Setup script
The way to make packages installable is by writing a file called setup.py. This describes the package metadata, what other packages are required and what other files might need to be installed. The setup file uses a package called setuptools which is “a collection of enhancements to the Python distutils that allow developers to more easily build and distribute Python packages”.
Before continuing you should start by upgrading to the latest version of setuptools and make sure that you also have wheel:
python -m pip install --upgrade setuptools wheel
The setuptools documentation contains very in-depth instructions on building and distributing packages. You can use my example here as a starting point and use the documentation to find the features you need. Here’s my setup.py, it should be placed in the root directory of the project:
#!/usr/bin/env python

import os
from setuptools import setup, find_packages


NAME = "consistentor"
DESCRIPTION = "Consistentor helps you select things consistently"
URL = "https://github.com/jannekem/consistentor"
AUTHOR = "Janne Kemppainen"
VERSION = os.environ.get("VERSION", "0.1.0")
PYTHON_VERSION = ">=3.6.0"
LICENSE = "MIT"
CLASSIFIERS = [
    "Development Status :: 3 - Alpha",
    "License :: OSI Approved :: MIT License",
    "Topic :: Software Development :: Libraries",
]

with open("requirements.txt", "r") as f:
    REQUIREMENTS = f.read()

with open("README.md", encoding="utf-8") as f:
    LONG_DESCRIPTION = f.read()

setup(
    name=NAME,
    description=DESCRIPTION,
    version=VERSION,
    packages=find_packages(),
    url=URL,
    author=AUTHOR,
    install_requires=REQUIREMENTS,
    python_requires=PYTHON_VERSION,
    long_description=LONG_DESCRIPTION,
    long_description_content_type="text/markdown",
    license=LICENSE,
    classifiers=CLASSIFIERS,
)
The first line is the shebang which tells Unix based systems what interpreter should be used and would let you run the file with the Python interpreter by executing the file directly. It’s nice to have but by no means necessary.
Next we have some imports. The setup function from setuptools is the one that does all the magic.
I’ve set the configuration values as constants so that they are a bit easier to manage and read. Here are their descriptions:
| Variable | Description |
|---|---|
| NAME | The name of the package |
| DESCRIPTION | A short description of the package |
| URL | The homepage for the package, for example the GitHub repository or a documentation website |
| AUTHOR | The name of the package author |
| VERSION | The version number of the package, which in this case is obtained from an environment variable with the same name |
| PYTHON_VERSION | The supported Python versions |
| REQUIREMENTS | The contents of the requirements.txt file |
| LONG_DESCRIPTION | The contents of the README.md to show as the long form description on PyPI, the long description content type needs to be set to “text/markdown” so that it is displayed properly on PyPI |
| CLASSIFIERS | A list of strings to classify the package as defined on pypi.org |
Finally the script is just calling the setup() function with all of the parameters which takes care of the rest of the process. Notice the call to find_packages() which will automatically search for packages to be included in the distribution.
I’m getting the requirements from the requirements.txt file so that they can be kept in one place. The version number is also fetched from the environment variables so that it will be easier to create an automated build pipeline.
I have omitted the author_email parameter as it is not actually required even though the tools might say otherwise. You can include it if you so wish.
When your setup file is finished you can use the following command to build the distribution:
>> python setup.py sdist bdist_wheel
This will build two versions of your package:
sdistis the source distributionbdist_wheelis a binary distribution in the Wheel format which is a lot faster to install for the end users because it doesn’t involve a build step like the source distribution does
After running the command a new directory called dist should appear. This is where the packages are stored after building. The source distribution is packaged as a tarball (.tar.gz) and the wheel binary has the .whl extension.
You can try it out by creating a fresh virtual environment inside the dist directory and installing your package from the Wheel (change the virtual environment activation to match your operating system):
>> cd dist
>> python -m venv venv_test
>> .\venv_test\Scripts\Activate.ps1
>> python -m pip install consistentor-0.1.0-py3-none-any.whl
The installation log should show that the package and the xxhash dependency have been installed successfully. If you now open an interactive Python shell you should be able to import from the custom package:
>>> from consistentor import Selector
Now our package is ready to be released!
Release pipeline
Next we will create a continuous integration pipeline for the project using GitHub Actions which is a way to run custom code on the GitHub servers when events happen such as a new pull request is opened or commits are pushed to a certain branch.
We are going to configure two action flows:
- Run unit tests for commits on pull requests
- Publish the package to PyPI when a new release is created
The awesome-actions repository is a great resource for finding great official and community contributed actions. You can also browse the Actions marketplace to find more actions to be used in your project. You can find the workflow syntax from the Actions documentation.
Automating unit tests
Go to your repository on GitHub and select the “Actions” tab to get started with Actions. GitHub might suggest you some starter workflows but you can skip them by clicking the “Set up a workflow yourself” button. This will open a code editor with a file in a directory called .github/workflows/. Change the name of the file to test.yml. This configuration file uses the YAML format.
Replace the file contents with these lines:
name: Run unit tests
on:
  push:
    branches: [ master ]
  pull_request:
    branches: [ master ]

jobs:
  test:
    # The type of runner that the job will run on
    runs-on: ubuntu-latest

    # Steps represent a sequence of tasks that will be executed as part of the job
    steps:
    # Checks-out your repository under $GITHUB_WORKSPACE, so your job can access it
    - uses: actions/checkout@v2
    - name: Set up Python
      uses: actions/setup-python@v1
      with:
        python-version: 3.8
    - name: Install dependencies
      run: |
        python -m pip install --upgrade pip
        python -m pip install -r requirements.txt
    - name: Run unittests
      run: python -m unittest discover tests
Let’s go through the file step by step.
The first line is the name of the action, in this case “Run unit tests”. You can use any name you want and if you omit this setting the filename will be used instead.
The on settings is required as it controls when this action is triggered. This configuration listens to two events:
- push to the master branch
- pull requests to the master branch
The workflow consists of jobs that can run in sequence or in parallel. In this case we only have one job which is for running tests. The runs-on parameter sets the type of the runner. The Ubuntu based runners are the cheapest to run so they don’t consume as much of your free quota. If you absolutely need it you can also use Windows or macOS runners.
The test job consists of steps. Each step can be an external action or a command. The checkout action fetches your Git repository so that the later steps can then use it.
The next action sets up the Python interpreter. You can choose which Python version you want to use and you could even define a matrix of Python versions to make sure that the code works on all the versions that you want to support. Again, you can find more information from the Actions documentation about using Python.
The last two steps are simply calls made on the command line using the run keyword. The dependency installation uses the pipe character on the first line which allows you to write multiple commands on separate lines inside the same step. The unittest step uses the same command to run the tests as we did on our own machine. If the tests fail the command will return with an error status which will in turn fail the whole job.
After making the changes click the green “Start commit” button, choose “Create a new branch and start a pull request” and click “Propose new file”. Then continue by creating the pull request. The check should start automatically shortly after.
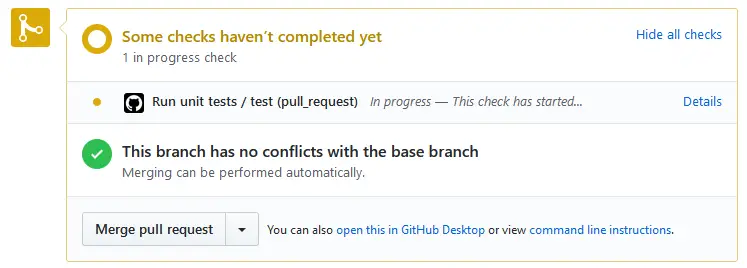
The tests should pass quite quickly and the status should change to green.
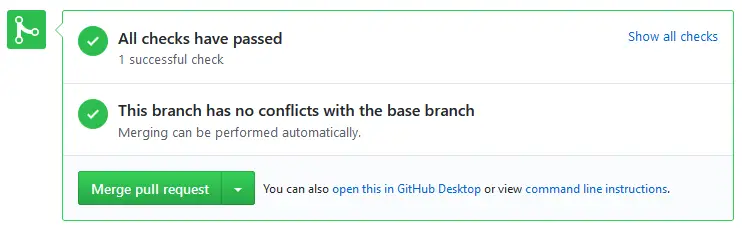
You can click “Show all checks” and then “Details” on the unit test check to see the logs of the test run. You can also go to the Checks tab of the pull request to see the logs.
If you merge the pull request the tests will be run again against the merge commit.
You can create a nice status badge for the test status from the Actions tab of the repository. Select your unit test workflow on the list and click the “Create status badge” button on the right. Choose the push event so that the badge is only created on push to master and copy the Markdown code.
![]()
The badge will contain the name of the action and if it is passing or failing. Currently the badge doesn’t support user defined values.
Deployment
Finally, we need a way to deploy our package to the index. As I already mentioned we are going to be utilizing GitHub Actions to publish the package when someone creates a new release on the repository.
First you’ll need to create an account at PyPI so that you can push packages there. Go to your account settings and under the API tokens section click “Add API token”. Give it a name and set the scope to “Entire account (all projects)” if you already haven’t pushed your project manually to PyPI.
This token will be visible only once so copy it to your clipboard. Then go back to your repository in GitHub and navigate to “Settings” > “Secrets” and click “Add a new secret”. Name it PYPI_TOKEN and paste in the value you just copied. It should now be listed on the secrets tab and accessible to our next action.

Navigate back to the actions tab on your repository and click “New workflow”. Click again the button that skips the suggested starter templates, name the file deploy.yml and make the file look like this:
name: Upload Python Package

on:
  release:
    types: [created]

jobs:
  deploy:

    runs-on: ubuntu-latest

    steps:
    - uses: actions/checkout@v2
    - name: Set up Python
      uses: actions/setup-python@v1
      with:
        python-version: '3.8'
    - name: Install dependencies
      run: |
        python -m pip install --upgrade pip setuptools wheel
        python -m pip install -r requirements.txt
    - name: Run unit tests
      run: python -m unittest discover tests
    - name: Extract version tag
      run: echo ::set-env name=VERSION::${GITHUB_REF:10}
    - name: Build distribution
      run: python setup.py sdist bdist_wheel
    - name: Publish distribution to PyPI
      uses: pypa/gh-action-pypi-publish@master
      with:
        password: ${{ secrets.PYPI_TOKEN }}
    - name: Update release binaries
      uses: svenstaro/upload-release-action@v1-release
      with:
        repo_token: ${{ secrets.GITHUB_TOKEN }}
        file: dist/*.whl
        file_glob: true
        tag: ${{ github.ref }}
This time the action is triggered when a new release is created. Otherwise the script starts similarly to the previous one. The dependency installation step installs the package requirements as well as the required build tools. The flow is running unit tests once more just in case if someone is trying to create a release from a broken branch. Note that the release doesn’t have to come from the master branch.
The GITHUB_REF environment variable contains the git tag for the release but it is in the form of refs/tags/1.2.3. However, this is not valid for the version number so I found the way to extract the version tag from this question on Stackoverflow. This step sets the VERSION environment variable which is then available for the build script in the next step.
The build itself is called in the same way as we tested on our own machine and the results will be stored again in the dist/ directory on the runner machine.
The upload is done with the help of the PyPI publish action which needs the access token as a parameter. It can be accessed from the secret that we set earlier.
I also included a final step to upload the wheel distribution to the release on GitHub with the upload-release-action from the community. This way the binary package can also be downloaded from GitHub if PyPI is not an option for some reason.
Creating a release
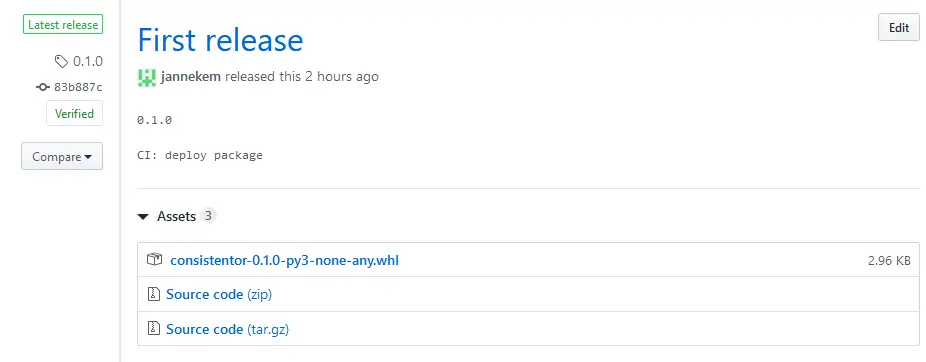
When the action workflows are configured you can simply create a new release in GitHub and the code will be automatically built and deployed to PyPI. You can navigate to the releases from the repository home page by clicking the release count link.

From there click “Draft a new release” and fill in the details for the release (version, title, description). After clicking “Publish release” the workflow script should trigger automatically and upload the new version to PyPI. After a while you should also be able to see the wheel binary distribution included in the release assets.
The package is now available on PyPI as consistentor and you can install it with
python -m pip install consistentor
Conclusion
That is how you can create your own Python packages and build a nicely automated CI pipeline for the project. I’m all for automation and think Actions has been a great addition to the GitHub platform. Stay tuned for more posts about GitHub Actions as well as bites and pieces of Python!
In the meantime, post your comments on Twitter on the embedded tweet!
Pull requests are also welcome if you want to extend/improve this small project.
Read next in the Python bites series.
Discuss on Twitter
Create your own Python package and deploy it automatically to PyPI when you publish a new release on @github using GitHub Actions https://t.co/KpPpTXI3hp
— Janne Kemppainen (@pakstech) May 16, 2020
Previous post
Why Merging Hashes With Xor Can Be Dangerous?