Related Content in Hugo
Janne Kemppainen |You may have noticed that many blogs like to promote other posts at the end of an article. Hugo can do this too with its related content feature. This means that you don’t have to hand pick those related posts for each new piece of content you write but you can let Hugo do it for you automatically. If you scroll down to the bottom of the page you can see a live example on this very page.
Let’s start with the related content. I’ll start by showing the desired end result so that you might be inspired enough to go through this post.
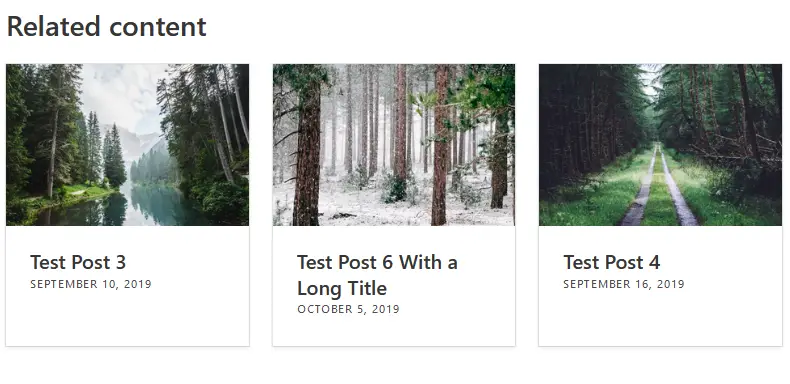
Related content at the end of a blog post
As you can see the design is simply showing three posts with titles, images and publish dates and nothing more. If you’ve read through the previous article in the series you should remember that we created a bit similar card template for listing blog posts on list type pages. Here I’m using a stripped down version of that template.
How it works in Hugo?
But before getting started with how it will look you need to learn how related content works in the Hugo context. The main expectation you might have is that Hugo will somehow magically look through the content of each and every blog post you have written and then come up with a perfect list of related pages. Unfortunately, that’s not quite how it works, at least for now.
Instead, Hugo relies on the information that you put on the front matter of each page. By defining taxonomies, tags, etc. you can give more and more information for Hugo to guess wchich content might go well together. This makes sense as posts in the Web Development or Raspberry Pi categories tend to be more or less related to each other and are more likely to interest the visitor that has stumbled upon those pages.
There is a dedicated page in the Hugo docs for related content. It does contain pretty much all the info you need but it can still be a bit difficult to get a grasp of it if you’re a beginner so I hope that this practical example can guide you through.
Configuration
Let’s talk about the most important thing first, configuration. Hugo needs to know how to relate the pages to each other and which are the aspects it should assign the most value to.
As per the Hugo documentation the default configuration for related content is the following (in YAML):
related:
  threshold: 80
  includeNewer: false
  toLower: false
  indices:
  - name: keywords
    weight: 100
  - name: date
    weight: 10
This means that Hugo is primarily looking for a list of keywords in the front matter of each page and matching posts that share the most keywords. It’s also using the date parameter with a smaller weight.
You can start using keywords if you like. However, we’ve been adding categories to the blog posts and I think they serve this purpose perfectly. Using categories means that you don’t need to put too much effort into coming up with suitable keywords that might match with other posts on your blog.
There are of course exceptions to this and you might want to specify the content relationships more granularly. In that case by all means use keywords, or create a totally separate front matter parameter such as “related” for related content.
The default configuration has a threshold value of 80 for matching content. That means that if there is no other content in the same category then the recommendation list will be empty. Personally, I prefer showing at least some content even if it isn’t perfectly related to the current page.
The default configuration example has been written in YAML but so far we’ve been using TOML for site configuration. Here’s an alternative configuration that you can add to your config.toml:
[related]
    threshold = 0
    includeNewer = true
    toLower = false

    [[related.indices]]
        name = "categories"
        weight = 100

    [[related.indices]]
        name = "date"
        weight = 10
I’ve reduced the threshold to zero so that there will always be at least some recommendations. With this configuration Hugo seems to suggest the newest pages.
I have set the includeNwere parameter to true which makes Hugo suggest newer pages too. By default only older pages than the current one are included. I think the choice might be a matter of taste so choose the setting that makes most sense to you.
I’ve also changed the keywords index to categories instead.
Implementation
So now that we have the required configurations and know how Hugo finds the relationships between pages we can create the actual page content.
Create a new partial file layouts/partials/widgets/post-card-small.html just like we did for the post cards in the previous blog post. You can use the following template for a simple card layout:
{{ $permalink := .Permalink }}
<div class="card">
<div class="card-image">
<figure class="image is-3by2">
{{ with .Params.images }}
<a href="{{ $permalink }}"><img src="{{ index . 0 }}" alt=""></a>
{{ end }}
</figure>
</div>
<div class="card-content">
<a class="title is-5" href="{{ .Permalink }}">{{ .Title }}</a>
<span class="heading"><time>{{ .PublishDate.Format "January 2, 2006"}}</time></span>
</div>
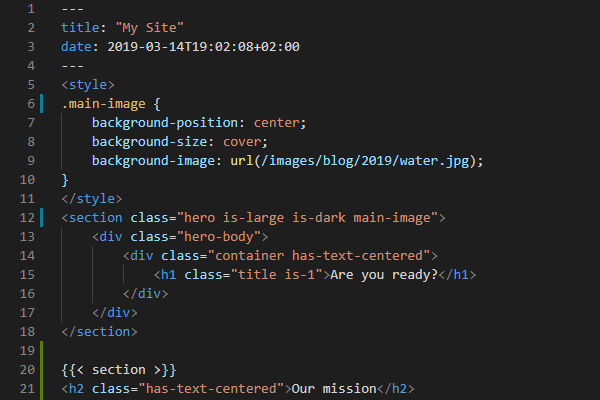
</div>Then open the layouts/blog/single.html that we’ve been working with and add this section at the end of the file, before the final end statement.
<section class="section">
    <div class="columns is-centered">
        <div class="column max-800px">
            <div class="content">
                <h2>Related content</h2>
            </div>
            <div class="columns">
                {{ $related := (where (.Site.RegularPages.Related .) "Type" "blog") | first 3 }}
                {{ range $related }}
                <div class="column is-one-third">
                    {{ partial "widgets/post-card-small.html" . }}
                </div>
                {{ end }}
            </div>
        </div>
    </div>
</section>
Most of it is just for getting the layout to match the current page design properly and to respond to different screen sizes in the same way. The CSS classes come from the Bulma framework with the exception of the custom class max-800px which limits the width of the column. Here’s the definition again if you haven’t read the previous posts in the series:
.max-800px {
    max-width: 800px;
}
The most critical part starts from line 7 onwards from the “columns” div definition. Inside the columns container there is a range loop through the related pages. This loop uses the widget that we just defined earlier. But how does the definition of the $related variable actually work?
To get all related pages of the current page you can use the expression
.Site.RegularPages.Related .However, this will also include normal pages and with the custom settings that I’ve defined on this blog post it is possible that a normal page such as “About” might end up being recommended. To make sure that only blog posts are allowed on the related pages list I have wrapped the related content definition with a where clause which filters the content based on the page type:
where (.Site.RegularPages.Related .) "Type" "blog"The final thing to add is to filter the top three related pages with the function first so that we get the full code:
{{ $related := (where (.Site.RegularPages.Related .) "Type" "blog") | first 3 }}If you add the following CSS to style.css the cards will all have equal height even when the titles wrap a different amount of rows.
.card {
    height: 100%;
}
And there you have it! Now you know how to add related content to a Hugo site.
Read next in the Blog with Hugo series.
Previous post
Install Python on Windows With Virtual Environments